Working with pre-manufactured wooden wall panels simplifies the DIY process. This is because these panels come ready to use. As a result, it allows you to focus on installation and design. However, before you install your wood panel, you need to plan your layout and prepare your wall. Only after that you can install the panels. This way, you can achieve a professional-looking result with minimal hassle. Enjoy the transformation of your space with beautifully installed wooden wall panels and the satisfaction of completing a rewarding DIY project.
Planning and preparation
Planning is the key to any project. Therefore, you must plan your project carefully before installing your wood panel. You can start by measuring the wall where the panels will be installed. You should measure the height and width of the wall and any areas where the panels will need to fit around obstacles like electrical outlets or windows. Then, you have to create a layout plan to determine how the panels will be arranged. Ensure that the layout is symmetrical and complements the room's design.
Gathering tools and materials
Although wooden panels are often pre-manufactured, you will still need various tools and materials for installation. Gather items such as a level, measuring tape, utility knife, adhesive (if applicable), nails or screws, a drill, and a saw for any adjustments. Having everything on hand will make the installation process smoother and more efficient.
Preparing the wall
Preparation of the wall is crucial for a successful installation. You need to make sure the wall surface is clean, dry, and smooth. You might need to patch any holes or imperfections in the wall to ensure that the panels adhere properly. If the wall is painted, you might want to consider sanding it lightly to help the adhesive or nails grip better. However, it depends on how much time and effort you are willing to expend.
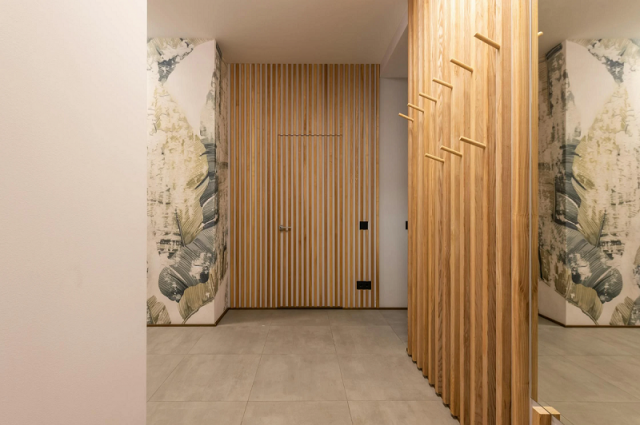
Installing the panels
Installation is relatively straightforward if you decide to use pre-manufactured wooden wall panels. You can begin by marking where the panels will go on the wall. If you are using adhesive, apply it evenly to the back of each panel according to the manufacturer's instructions. Then, press the panel firmly onto the wall. For panels that require nails or screws, you must use a drill to create pilot holes and then secure the panels in place. Also, ensure each panel is level before moving on to the next one to achieve a seamless look.
Final touches and maintenance
Once all panels are installed, inspect the wall for any gaps or uneven areas. Fill any gaps with caulk or wood filler as needed and touch up the finish if required. To maintain your wooden wall panels, regularly dust them and clean them with a mild wood cleaner. Avoid using harsh chemicals or excessive moisture, which could damage the panels over time.


