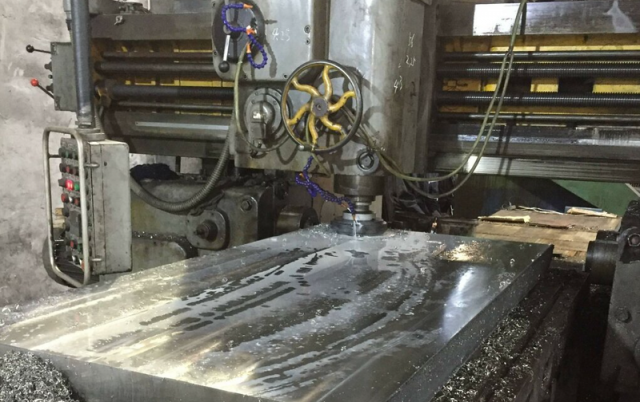
Mounting a stainless steel plate to your CNC mill is a fundamental skill in CNC machining, but it demands precision and care. Given the wide range of grades available, from common austenitic stainless steel like 304 and 316 to other types, each with unique properties like high corrosion resistance and strength, securing them improperly can lead to costly failures. A poorly secured workpiece can shift, vibrate, or become damaged, ruining your part and potentially causing tool breakage.
This step-by-step guide covers the professional best practices for securely mounting a stainless steel plate for CNC milling, ensuring a successful and accurate machining process every time.
Why a Secure Setup is Critical in Stainless Steel CNC Work
Stainless steel CNC machining is more challenging than working with softer metals. The material is known for its toughness, tendency to work-harden, and high strength. These properties create significant cutting forces and vibrations. A rock-solid mounting setup is non-negotiable for:
- Safety: A loose plate is a dangerous projectile.
- Accuracy: Prevents movement that causes out-of-tolerance parts.
- Surface Finish: Eliminates chatter and vibration marks.
- Tool Life: Reduces sudden tool failure from a shifting workpiece.
- Efficiency: Allows for more aggressive, faster machining cycles, which is essential for managing the wide range of projects in CNC machining.
Methods for Mounting Stainless Steel Plates
The best method depends on the plate's size, thickness, and the required operations. For a wide range of general-purpose jobs, mechanical clamping is the go-to solution.
1. Using Step Clamps and Toe Clamps (The Most Common Method)
This is the most versatile method for securing plates directly to the mill table. It's ideal for a wide range of stainless steel CNC projects.
What you'll need:
- Step Clamps
- Step Blocks
- T-Nuts
- Studs or Clamp Bolts
- Toe Clamps (for securing plates where clamps might interfere)
Procedure:
- Clean Everything: Thoroughly clean the mill table's T-slots, the bottom of your stainless steel plate, and all clamping components. Any debris can compromise the hold.
- Position the Plate: Place the plate on the mill table, often raised on parallels to protect the table.
- Indicate and Align: Use a dial indicator to sweep the reference edge of the plate. Adjust until it is perfectly aligned with the mill's axis. This ensures precision in your CNC machining process.
- Set Up Clamps: Position step clamps so they hook over the edge of the plate, applying pressure downward and inward. Thread a stud through the clamp into a T-nut in the slot.
- Apply Even Pressure: Tighten the clamp nut firmly. Use multiple clamps around the perimeter to distribute pressure evenly, which is crucial for preventing distortion in harder grades like austenitic stainless steel.
- Final Check: Re-check your indicator readings to ensure the plate didn't shift during clamping.
Pro Tip: Use toe clamps for operations where a clamp might be in the toolpath. They grip the side of the plate, leaving the entire top surface clear for machining.
2. Mounting to a Fixture Plate
For production runs or complex parts involving a wide range of operations, a custom fixture plate is ideal. This is a hallmark of advanced stainless steel CNC work.
Procedure:
- Secure the Fixture: Bolt an aluminum or steel fixture plate to the CNC mill table.
- Machine Locating Features: Machine precise pins, pockets, or steps into the fixture that match your plate's dimensions.
- Threaded Holes: Drill and tap holes for socket head cap screws (SHCS).
- Mount the Plate: Place the stainless steel plate onto the locating features and secure it using SHCS. This method provides maximum rigidity, which is key for aggressive CNC machining.
3. Using a Vacuum Chuck
For thin sheets or plates where clamping around the edges isn't feasible, a vacuum chuck is an excellent solution. This method is perfect for preserving the finish on material prized for its corrosion resistance.
Procedure:
- Prepare the Chuck: Ensure the vacuum chuck surface is clean and flat.
- Create a Seal: Place your smooth, flat stainless steel plate on the chuck.
- Activate Vacuum: Turn on the vacuum pump. Atmospheric pressure holds the plate down with tremendous, even force.
- Safety First: Always use a vacuum sensor to alarm or stop the program if pressure is lost.
Essential Safety and Best Practices for CNC Machining
- Protect the Table: Always use parallels to raise the plate off the table surface to prevent cutting into the mill table.
- Mind the Toolpath: Simulate your CNC program to avoid collisions with clamps.
- Use Quality Hardware: Ensure your clamps and bolts are rated for the high forces of stainless steel CNC work.
- Check Twice: After tightening, re-indicate the part. A minute of checking can save hours of rework.
- Understand Your Material: Knowing you are working with austenitic stainless steel informs you to expect greater forces and potential for work-hardening, necessitating an even more rigid setup.
Conclusion
Successfully mounting a stainless steel plate is the critical first step to any CNC machining project. Whether you're working with 304 for its good corrosion resistance or another grade, the principles of rigidity and precision remain the same. By choosing the right method—clamps for a wide range of jobs, fixtures for production, or vacuum for thin sheets—you build a foundation for accuracy, safety, and flawless results. Mastering this skill is essential for anyone serious about stainless steel CNC.


