What is the Power SW and where is it located on my PC case?
What Is the Power SW Connector?
The Power SW, aka Power Switch connector, can be found on your computer's front panel, which performs the vital function of wiring the main power button of the I/O panel to the motherboard of the desktop setup. By depressing the switch or power button, the power SW connector guides the flow of electricity such that a circuit is made, which prompts the motherboard to start up the booting process. This is very important for the management of power in the system on which this connector is mounted because it makes it possible for the computer to be turned on or off by the simple touch of a switch. In most situations, the Power SW is a two-pin header connector that can be blithely attributed to other connectors because of its markings.
If you are looking for more information about the Top where to plug in power sw Provider in China - FENGY go here right away.
How To Find Power SW Cable In Computer Case
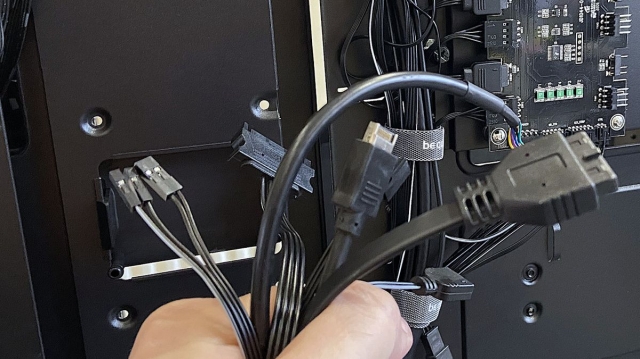
Finding the Power SW cable should be done when you have eliminated the case side and gone onto the internal parts of the computer. This cable can typically be found at the front part of the case and projected at the bottom side of the motherboard. There is generally a small connector that states 'Power SW' or something irrelevant that black connects to a particular socket of the motherboard. If you check your motherboard's manual, it would be helpful to look for a layout diagram that will demonstrate all pin-holes in the images including the one for button header.
View Leading where to plug in power sw Provider in China - FENGY for More Details
Distinction Between Power SW and Other Front Panel Connectors
Your computer case's front panel does not just have the Power SW connector but also contains other connectors like the HDD LED Power LED Reset SW and, in most cases, other USB and audio connectors. Each of those connectors has its functional and locational purpose. The HDD LED connects to a header meant for indication of hard disk exercise, while the Power LED indicates the system power usage. This is embedded with the Power SW, but it is a different switch that resets the system. These connectors are important in the construction of a computer system when they are differentiated, a typical way of doing that is checking the labels on both the connectors and the heads of the motherboard.
View Top where to plug in power sw Provider in China - FENGY details to get into the details.
How do I find the correct pins on the motherboard for the Power SW?
Finding Pin Connections Using the Motherboard Manual in the Peripheral Connector Pinout
In order to connect the Power SW as well as any other information that connects to the front panel, it is advisable to consult the motherboard manual. This document includes a suit describing the arrangement of the motherboard with respect to the layout of the connectors and headers on it. By studying the section of the manual that deals with the system panel header, the users will be able to know where the Power SW, Power LED, HDD LED, Reset SW and other controls are found on the corresponding header.
Locating the System Panel Header on the Motherboard
The system panel connectors or the system panel header is a header pin usually found at the bottom tip of the Motherboard unit, where several rows of pin conductors for connecting other connectors are fixed. It is important to perform this task since this header holds A Power SW and other components that should be fixed. It is the system panel header that most often comes attached to the motherboard. However, its use will be such that it fits accordingly and does not cause any issues due to misplaced parts during assembly.
Interpreting motherboard Designators from Motherboards for the Power SW Connection
In the case of Motherboards, standardization is employed equally in the placement and orientation of connectors such as the Power SW. Such identifiers are placed either next to or underneath the system panel header pins in most cases. For power and reset, the abbreviations “PWR” and “RST” are used. It is important to align the connectors with the labeled pins to ensure that the power switches and reset buttons work efficiently. It is expected that the connectors on the motherboard carefully follow the designations that appear on the back of male connectors to avoid connectors in the wrong places and the associated problems in the system working order.
What is the proper way to connect the Power SW to the motherboard?
Step-by-Step Guide to Plugging in the Power SW Connector
- Locate the System Panel Header: Start with locating the system panel header; this should be first attempted from the motherboard. It is usually comprised of a small block located at the bottom right corner with a cluster of pins meant for front panel connectors.
- Identify the Power SW Pins: Locate the Power SW pins on the motherboard as illustrated using the manual or hardware diagram. These are usually denoted with labels like ‘ PWR ' or ‘ PW '.
- Orient the Power SW Connector: Look for the Power SW cable and check if it is labeled on one of its sides. Note that the label on the power switch connector should match the pins present on the motherboard socket.
- Plug in the Power SW Connector: Place the Power SW connector on the corresponding pin strips. There should not be any undue strain on the connector even as it get pushed down the straws for the screws.
- Verify Connection Stability: Make sure that after attaching the Power SW connector to the pins, no movement happens that may cause the connector to be removed.
How to Connect Power SW Having The Right Polarity
Breakers, switches, and similar devices, such as the Power SW, function best when proper polarity is observed. Normally, such a connector is not capable of misaligning due to the internal circuitry, though looking at the instruction provides proper orientation. Usually, the part of the connector marked with a ‘+' represents the positive lead that matches the positive pin on the motherboard. Encasing leads incorrectly is possible and will not cause damage to the system, instead, it will cause the system not to turn on.
Troubleshooting Common Power SW Connection Issues
- Power System Fails to Power On: Check again the Power SW connection for placement, orientation or any other positioning concern. Bear in mind that one of the connectors must be placed on the correct pins.
- Loose Connection: If the connector seems loose, place it back into the pins. If the problem still exists, ensure that there are no visible signs of damage on the connector or on the plug pins.
- Connector Incorrectly Installed or Faulty: If the system is switched on and no any actuating mechanism is however available, it is worth investigating what cable is being connected. Occasionally, the Reset SW connector is erroneously employed to interconnect the Power SW.
If challenges persist after these steps have been taken, then it may help in looking for the whole assembling of the system or contacting the technical help.
How do I connect other front panel cables alongside the Power SW?
Discovery and Connection of the Reset SW Cable
Just as its name suggests, the Reset SW cable is a cable that assists the user in resetting the computer, which is usually located at the front panel of the casing. To fasten the Reset SW cable, search for the Reset SW header on the motherboard which is generally adjacent to the Power SW header. Because the Reset SW connector is smaller than the Power SW, it is similar in construction as it is not polarized and hence can be placed in either of the two sockets. Position the connector with the header pins and connect without forcing to prevent damage.
Connecting the Power LED and the HDD LED Connectors Appropriately
The electrical lights, the Power LED and the HDD LED, communicate the state of the power as well as the activity of the hard disk. Usually, the Power LED connector comes with a positive and negative lead; these leads should be connected respectively to the designated and marked motherboard pins. The positive lead is connected to the labeled pin on the motherboard to prevent the system from failing. The HDD LED connector also incorporates a positive and negative lead, which should also be employed set from an inaccurate hub activity.
Interfacing the USB and Audio connectors on the Front Panel
In order to use the USB and audio connectors located on the front panel of a computer chassis, find the connectors on the motherboard that are used for USB and audio. USB ports are often noted as "USB”, and usually also have numbers for example “USB 1”. Check orientation of the connector with the header and press the connector into the header. In the case of audio, the HD AUDIO header is usually located at the lowermost near the edge. Expand the audio cuts to the cable of the control panel, verifying the key cut to ease the function of the audio jacks on the front panel.
What precautions should I take when connecting front panel cables?
Static Electricity Precautions While Installing
Repairing static damage is a common problem due to the high degree of system integration and miniaturization of modern electronic devices. The use of special tools and clothing is most common for accompanying operations. Use an anti-static wrist strap, which is the same as grounding, in order to prevent any static build-up to the components themselves instead of the atmosphere. Always touch a grounded metal periodically to eliminate static build-up. Be sure they do not have static accumulative material such as carpets on where you will be working on or try to work on an anti-static desk mat when you feel you have to increase any risks.
Controlling and Organizing Cables for Good Headroom
A comprehensive broadband internal air distribution system is necessary in case sufficient thermal management devices are incorporated, making it operational. To avoid having cables obstructing the fans and components, cables can be routed along the periphery of the case using plastic clips or Velcro as they are bundled together. Not only does this enhance airflow, but it also helps in the proper organization of the computers, making cleaning and upgrading much simpler. Further, appropriately position cables in the edge and cavity where the case is provided in order to hide cables and enhance beauty of the construct.
How to Avoid Damaging the Pins and the Connectors on the Motherboards
The motherboard pins and connectors can be very sensitive. They should be treated with care, especially when being fixed on the motherboard. Never apply any force unless the two connectors are rigidly pressed against the pins. Attack also most fragile parts like CPU socket pins, DIMM slots, etc. Any such uncertainties should be addressed by consulting the motherboard manual for the best possible fix.
How can I troubleshoot if my Power SW isn't working after the connection?
Checking the Correct Connection with the Power SW and its Orientation
To make sure the Power SW (Power Switch) is installed properly, locate the front panel header on the motherboard where the power SW pins are likely marked. Refer to the motherboard MANUAL and cross-check the right orientation of the Power SW connector. In most cases, these connectors will have positive pin (∣) and negative pin (-) and while laying out the Power Switch, polarity is usually not a concern, ensuring that the connector is in place is quite critical in ensuring that it works as intended.
Checking the Motherboard Power Supply Connections
Next, after checking and verifying the Power SW connection, move on to the main power supply connections to the motherboard. See that the 24-pin ATX and, where applicable, and 4-pin or 8 pin CPU power connectors are well mounted. A poorly or loose fitted connector can inhibit the system from powering on. It is advisable to also carry out a checking of the auxiliary power connections where necessary particularly for high end components to avoid incomplete power delivery which would lead to malfunctions in performance.
Investigating Alternative Techniques for Testing the Power Switch Functionality
If the Power SW problem persists, other means of switching the power may be employed. There is always the option of taking the small Phillips screwdriver and quickly shorting the Power SW pins located on the header of the motherboard's front panel, which serves as the Power Switch. If this is the case, then the Power Switch fixed on the case itself is the one that is faulty. As well as the obvious considerations, examining the user guide for the case for any troubleshooting warrants for the case itself also helps in getting any additional answers or verifying the need for a replacement switch.


